
I have blogged about Qwickly Attendance before. I much prefer to use Qwickly for attendance than the native Blackboard tool for reasons explained in the blog post.
Now, the college has gotten us a pro license for Qwickly, which means we get access to a bunch of additional features. I will be blogging about those, to make sure you guys are fully informed when choosing an attendance tool. I have to say that the regular version of Qwickly Attendance was already feature-rich. The pro version takes it further both in terms of attendance options, but also in terms of data and reports you can get.
The first feature I want to highlight is the ability to take attendance with a QR code. If you want a refresher on how to set up Qwickly Attendance in your course in the first place, and do some basic setup (like I said above, lots of options even at the basic level), go back to my previous blog post linked above.
If you want to use the QR code for check in, you first need to make sure that your students have the Qwickly app on their phones, otherwise, that won’t work. They won’t be able to just scan the QR code with their regular camera. So make sure you do that before anything else.
Next, you need to setup your check in settings on your end of the Qwickly integration.
Once in Qwickly, just navigate to the Settings item on the left sidebar.
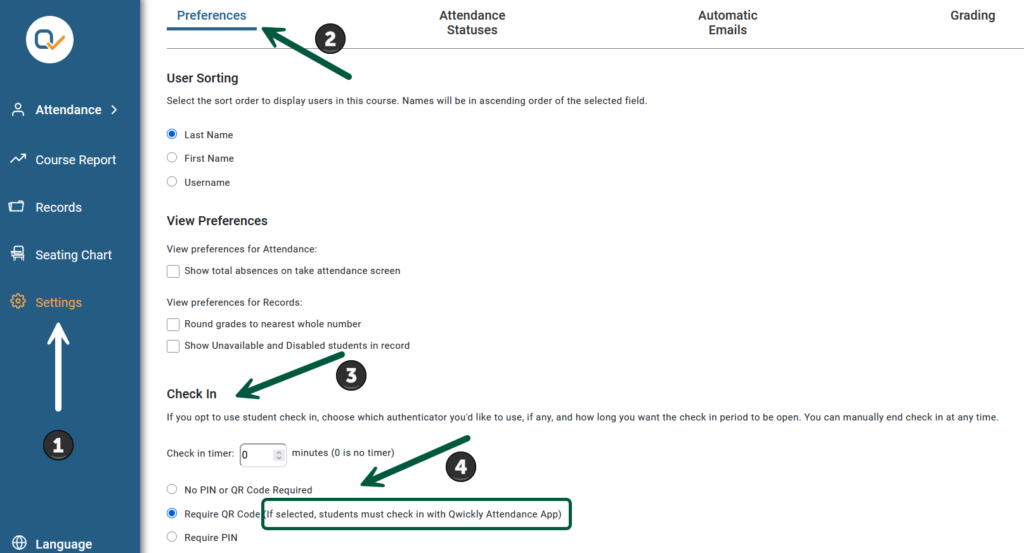
Then, under Preferences, scroll down to Check In, where you can set a timer, that is, how long check in will remain open. If you don’t set a timer, then check in will remain until you manually close it. Then, select the second option, where you’re reminded that your students will need the app.
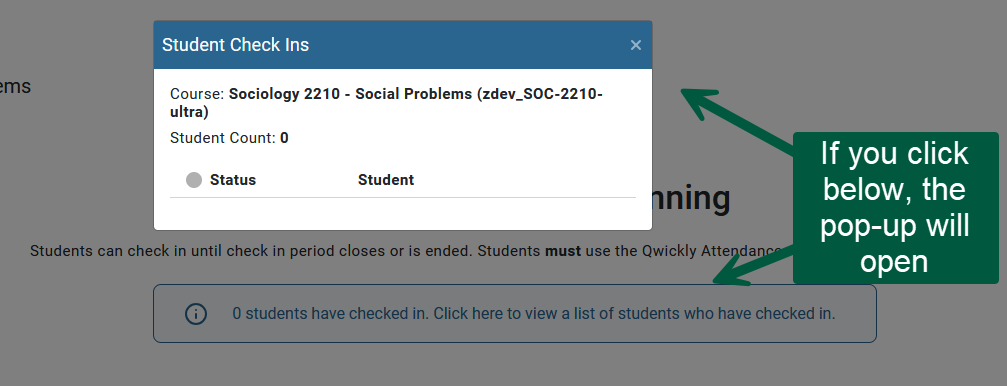
As long as check in is running, you will see a notification in Blackboard:

Make sure to save those settings before leaving,
Next, the check in itself:

You will need to navigate to the Check In option on the left sidebar (under the broad Attendanc area) to launch check in. You can give your session a title (helpful if you have a truckload of sessions). Toggle on the Location Context option if you have students in class and remote (as in the hy-flex mode). When you’re good and ready, click on Start Check In.
The following screen will open:

If you try this, you will notice that the QR code changes every few seconds. You can see your timer (if you set one) along with a manual End check in button. If you need to project a larger QR code, you have a button for that.
If you click at the top of the screen a pop up will open with the list of students who have checked in. Maybe don’t do that while the whole thing is in full view of the entire class.
And that’s pretty much all there is to it. Once check in is over, you can find your attendance under the Records options.
If you want to see a side-by-side demo with the student side of things, check out this video:
