

As you know, we all have access to Adobe tools through the college, so we might as well use them. Of course, Acrobat is the PDF application many of us use. Have you checked its accessibility options? I want to emphasize a couple of them in this post, with a focus on tagging.
The first thing I want to highlight is the Scan and OCR option on the left-hand side toolbar:

This option does what it says and will save a separate copy of your document with OCR added to the file name so you know this is the OCR’ed version (at least in Windows). The OCR’ed version is the one you should upload in Blackboard.
Let’s talk about tagging for a second. Tagging involves adding descriptive HTML tags to a document. These tags will not be visible to the reader but it will help a text reader identify the different elements of a document, such as headings, heading levels, paragraphs, figures, lists, etc. A tagged PDF is better than an untagged PDF for accessibility.
You can use Acrobat to see if a PDF you got from an outside source is tagged. Open Acrobat, load your file and take a look on the right-hand side toolbar, look for the tag icon:

In Windows, if you do not see the tag icon, right-click on the toolbar and you should see it in the menu that pops up. If you know you are going to do a lot of tagging, pin that icon to the toolbar so it is always visible.
If you click on that icon, it will show you whether you PDF is tagged or not. For instance:

The document I used here is the default one present in Acrobat. Obviously, it is tagged, as you can see on the right-hand side tool bar. If you click on the tags, you will see the element to which the tag correspond with a purple outline. That is helpful to determine whether the tags are correct.
But what if your document is not tagged?
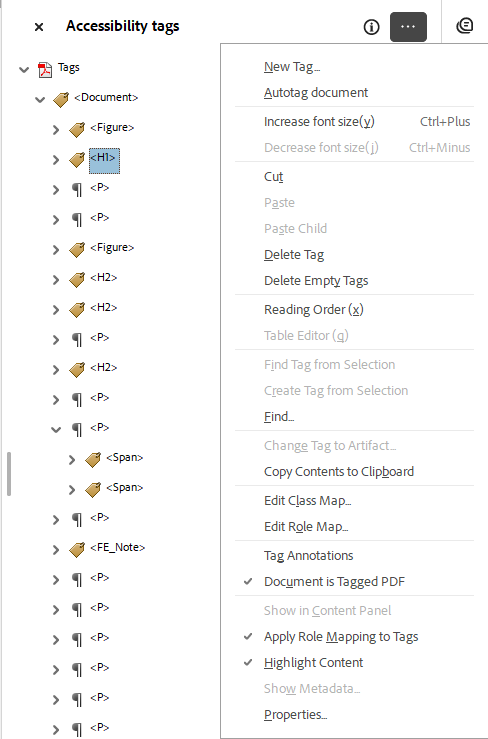
In this case, you would click on the three dots at the top right in my image above to find the following options:

Unless you want to engage in the awesome fun Summer game of tagging manually, I suggest using to the Autotag document option.
For illustration purposes, I uploaded a document I extracted from the Library databases, then clicked on Autotag, and presto:.

And just as before, you can click on each tag to see to which element of your document it refers, such as headers and header levels:

Or lists, please note that in this one, I opened to top tag to see the nested elements:
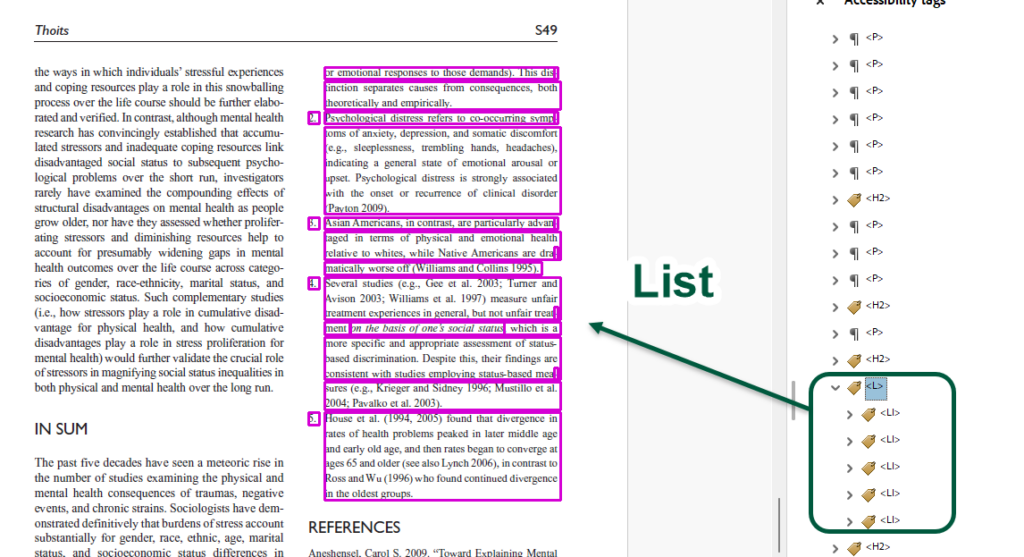
Or just regular paragraphs:

As always, with automated functions, you should double-check that everything is correct and make any changes as needed. You can do that by, again, clicking on the three dots at the top right:
In this case, I was lucky, my document was mostly text and everything was correctly tagged.
As always, you are working with your own document, with an original in Word or PowerPoint, make sure to do the accessibility check there before exporting (not saving) as PDF.
