
Even if you’re teaching course in a traditional classroom setting, sometimes students simply may not be able to make it to in-person office hours. Having a virtual option for office hours is an easy and attractive alternative, both for students and for you as their instructor. Not only does it make it easier for students to get the help and guidance they need, it’s also very little extra work for you to set up as an option when you use Collaborate.

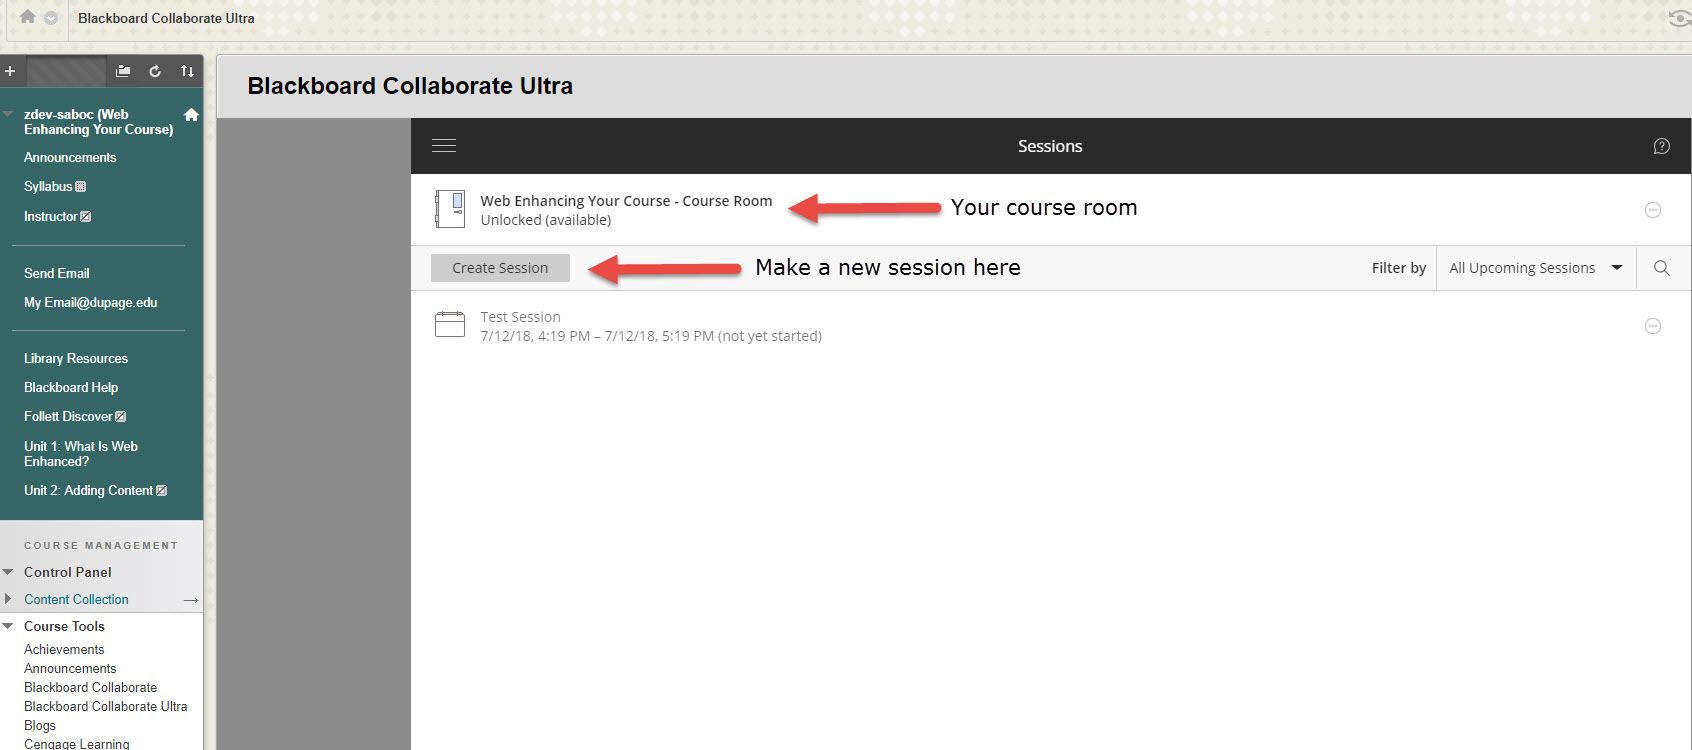
For those unfamiliar, Collaborate is Blackboard’s web conferencing tool. It can be used both in a browser on a computer and through Blackboard’s mobile applications on a smartphone or tablet. You’ll see that both Blackboard Collaborate and Blackboard Collaborate Ultra are available in the course tools menu. We strongly suggest using Ultra. This is for a couple of reasons. First, Ultra has more features that make it accessible to students with disabilities (live captioning is an important one). Secondly, it doesn’t require the java-based launcher that regular Collaborate does. Not only does this make it more simple to use, it also makes it readily available through Blackboard’s mobile apps. This means that students who are using everything from a Chromebook to a tablet will have equal access to Collaborate, no set up needed.
The Setup
Things to Know
Ready to get started? Here are a couple of other things to know that will streamline your virtual office hours.
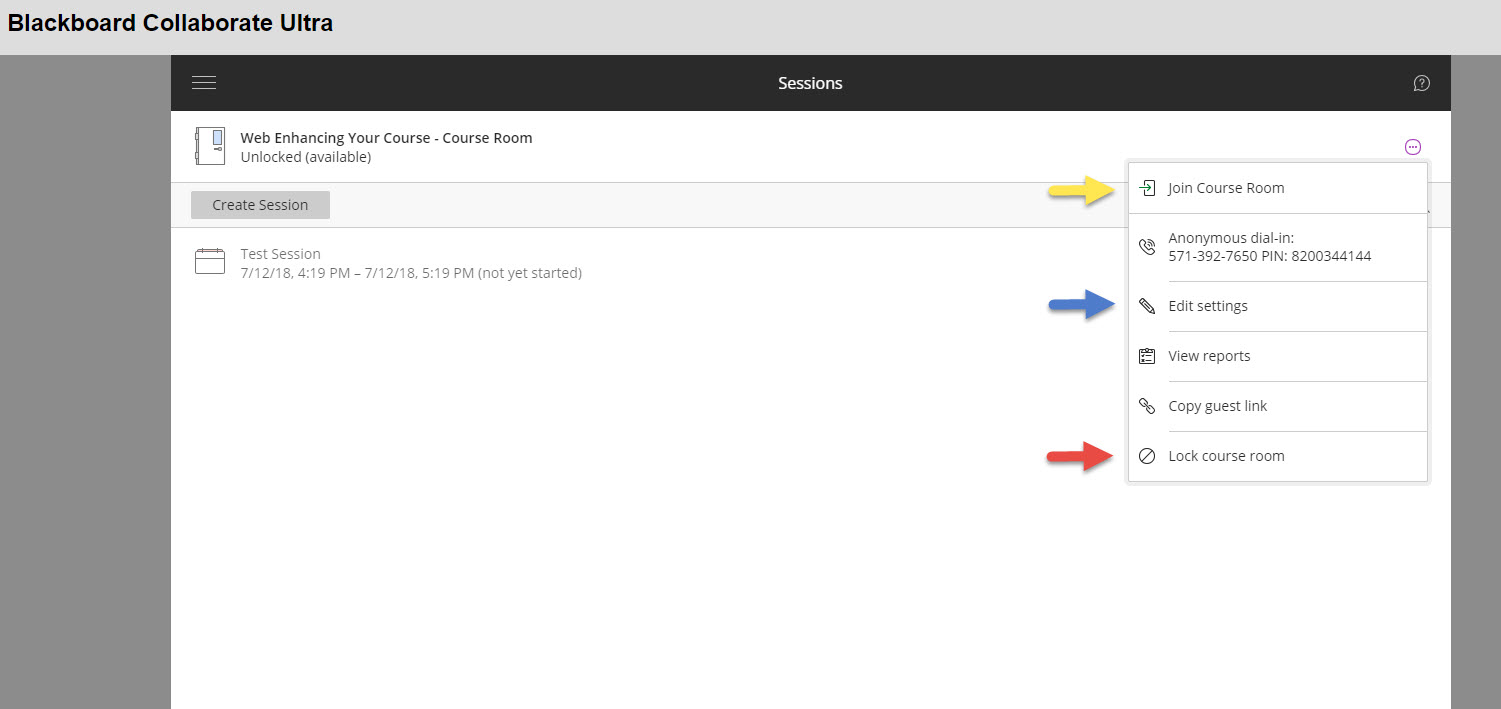
- Privacy is possible. If students enter a room and need to speak to you privately (or you decide the conversation should be moved to a private setting), you have a few different options. If a simple chat is fine, you can send your student a private message through the chat window. If you need to talk, go back to Create Session then use Roles and Access to select “restrict access to this session”. This will allow you to add the participant that you want to talk privately with.
- Utilize your settings power. In any Collaborate session you create, you have complete control over which students can enter and what they can do when they’re there. To change your room’s settings, click Edit Room. This will allow you to tailor the room to your needs.
- Invite outsiders in. Did you know that a student doesn’t have to be currently enrolled in your course to attend your virtual office hours? You can send a URL to invite a guest to a Collaborate session. This can be a great way to interact with any student who may want to talk to you about past or future courses or to invite in outside experts and advisors who can help students.
- Ensure students know how to find and use Collaborate. Remember, that regardless of how you choose to hold virtual office hours, you will need to clearly communicate that information to students. Share the name of the room and some basic instructions about how to access the session, including a direct link to Collaborate in your course content. Many students have not used Collaborate before and may need a little help getting oriented.
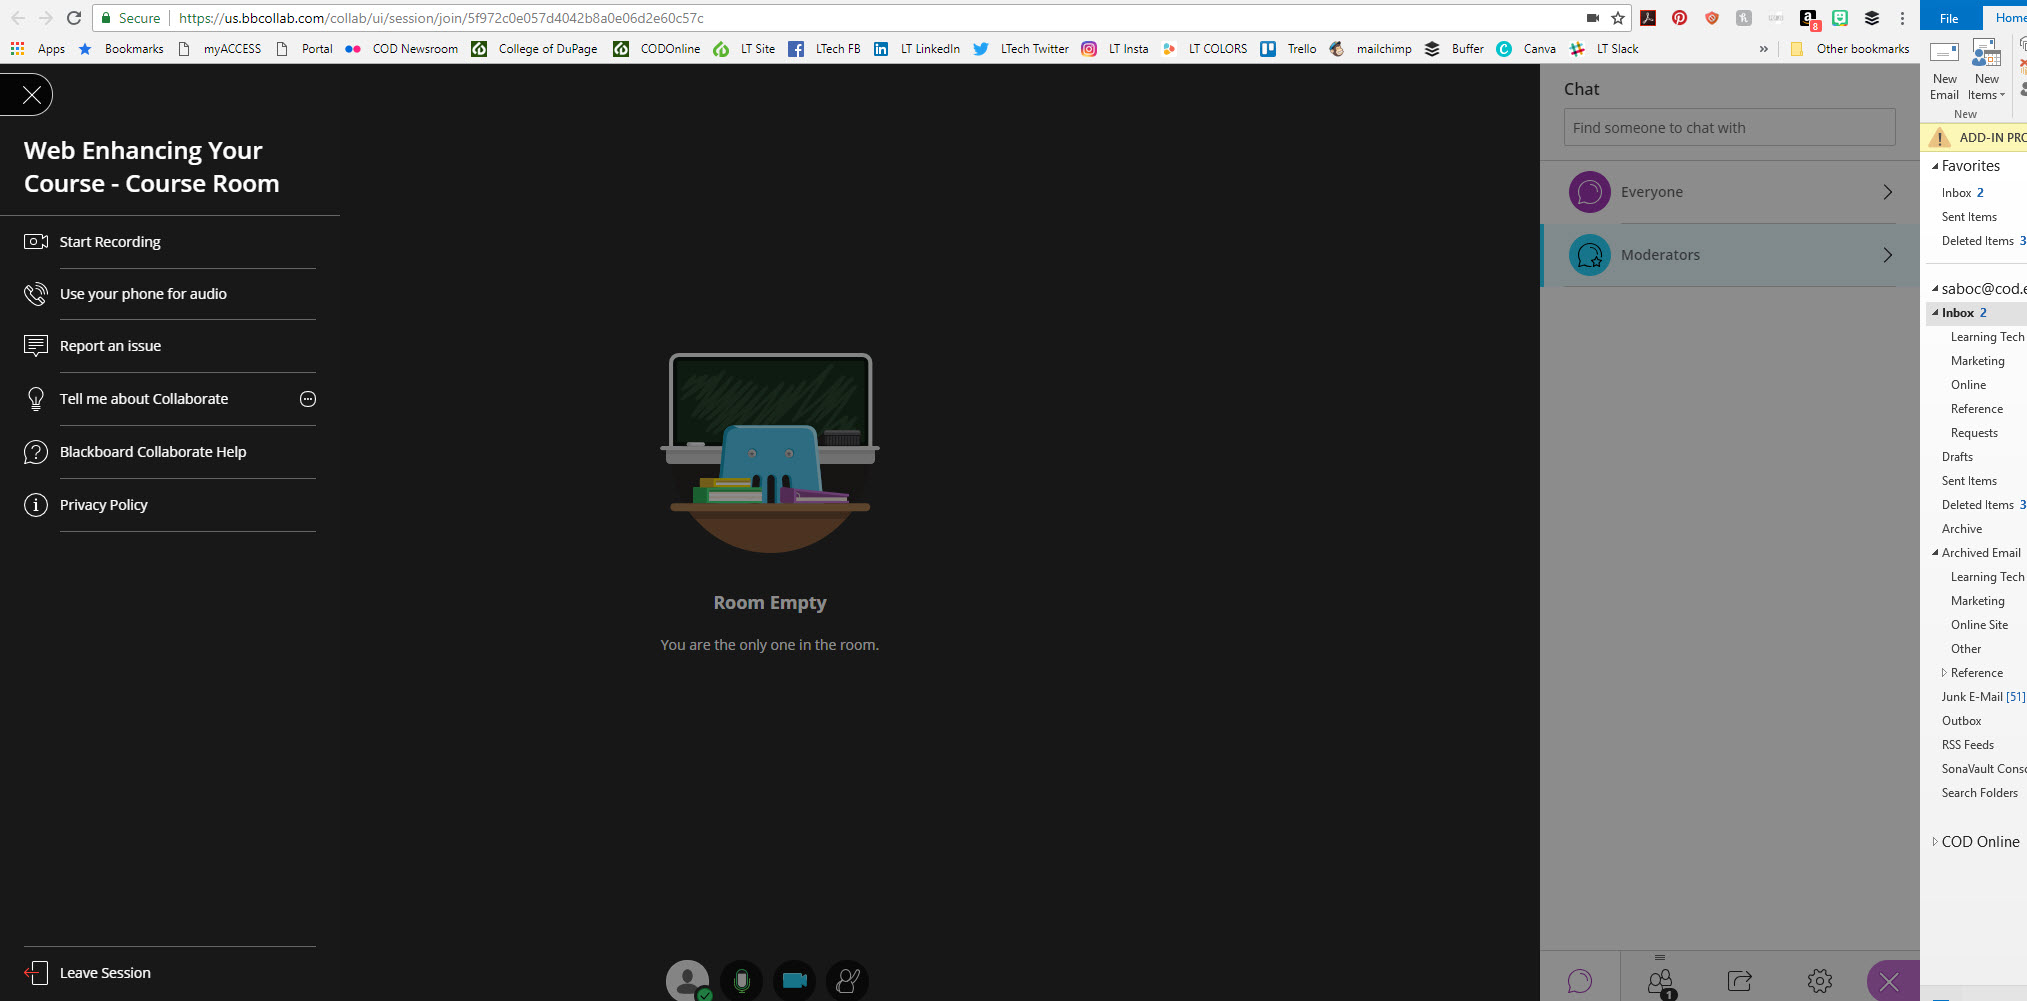
- Record your sessions. If you’re giving out information that you think would help all of your students, not just those who came to office hours, you can record and share the sessions for later. The recording option is found in the upper left hand pop-out menu in your Collaborate session.
