PDFs are one of the most common file formats found in COD courses and it’s likely that everything from your syllabus to the course reading materials is in PDF form. That ubiquitousness is why it’s so critical to ensure that the PDFs in your course are accessible.
Here, we’ll explain how an accessible PDF is created, whether you’re creating a new PDF via Word, scanning in documents, or revising existing PDFs.
Saving Microsoft Office Files as PDFs
The first step in creating an accessible PDF from any kind of Office file is to ensure that the original file is accessible. You can find our guide to Word documents here. After that, there are a couple of different ways that you can create an accessible PDF, depending on the version of Office/Acrobat you have.
Option 1, for Older Versions of Office
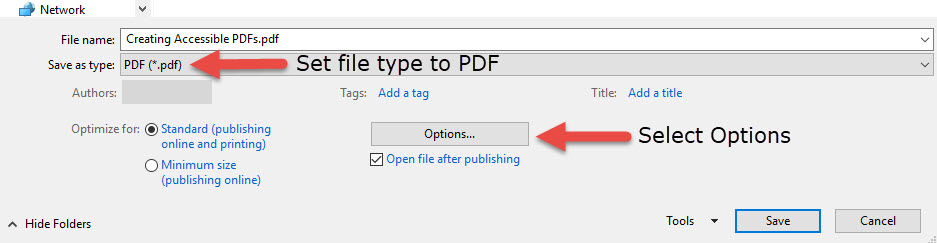
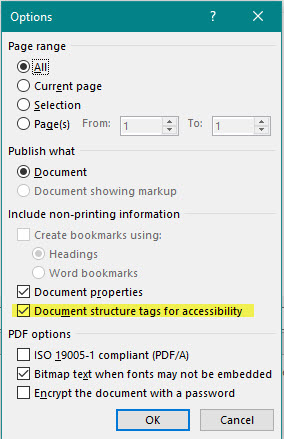
Creating an accessible PDF is easier in new versions of Office, but still relatively simple in older versions. First, click Save As then choose PDF as the file type. Once you do that, underneath the file type you’ll click on Options. Make sure “Document Structure tags for Accessibility” and “Create Bookmarks Using Headings” are both checked (by default they should be). Click OK and Save.
Option 2, for Newer Versions of Office
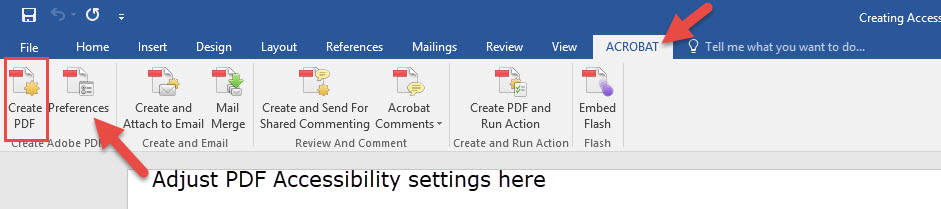
It’s never been easier to create an accessible PDF from Office. First, select Save as Adobe PDF, either from the File menu or from the Acrobat tab at the top. This should create a tagged PDF by default. If it does not, use the the Acrobat tab to select Preferences. Check “Enable Accessibility” and “Reflow with Tagged Adobe PDF.” Provided your original document was created with accessibility in mind, this should give you a pretty accessible PDF.
Option 3, In Acrobat
You don’t have to convert your file in Office, you can also use Acrobat itself. Go to File> Create PDF> From File (Or File> Create> PDF from File if you have Acrobat X). Make sure that “Enable Accessibility and Reflow” is checked. If you want to combine multiple files into one PDF, select File> Create PDF> From Multiple Files (in Acrobat X, File> Create> Combine Files into a Single PDF).
Remember, to create an accessible file using this method, your original files MUST already have the accessibility best practices applied to them (alt text, headings, etc). Additionally, don’t print to PDF. This will not create an accessible file. Mac users on Office may find that Word will not always allow them to create a fully accessible PDF, so other measures may need to be taken to ensure that a PDF is disability-friendly.
Creating Accessible PDFs from Scanned Files

Have something that you want to scan and use for your courses while still keeping everything accessible? Shouldn’t be a problem!
Open the Tools panel in Acrobat. Then go to Enhance Scan and select your file or scan a new file. Hit start. At the top you should see a menu. Select “Recognize Text” and then “Correct This Text.” That will let you fix any errors in the text recognition. You’ll also want to click the Edit button to adjust the OCR settings, selecting English for Primary OCR Language, Searchable Image for PDF Output Style and 600 DPI for Downsample To.
Just to be sure, you may still want to run the accessibility checker on your scanned file, but this is a really helpful first step for improving accessibility.
Checking Existing PDFs for Accessibility
If you already have your file in PDF format it’s not too late to make it accessible, though it might take a bit of work on your part. Keep in mind that many of your course materials will be used year after year with minor changes, so this work is simply an up front investment that will pay big accessibility dividends for years to come.
To do this, you’ll need Adobe Acrobat Professional. This is available to all COD staff and faculty. If you do not already have it installed, simply call (630- 942-4357) or email the Helpdesk for assistance.
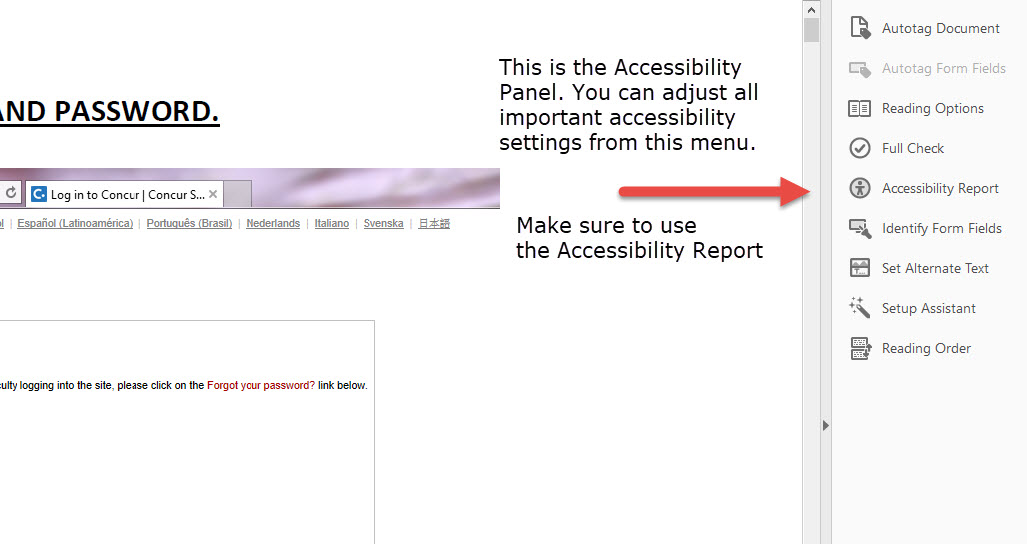
Once you have your PDF open in Acrobat, you’ll click on the Tools tab and then under Protect & Standardize you’ll select Accessibility. In the panel on the right, you’ll select the Full Check button. The Accessibility Checker window will open and under Report Options you’ll check on the Create Accessibility Report and under the Checking Options you’ll select everything under Document (these are usually checked by default, but if they aren’t you’ll need to fix it). Click the Start Checking button.
Acrobat will then check your document for any accessibility errors and the report will pop up on the left side. You can then see where your document passed or failed in each category. Right clicking on any of the “fail” items will tell you why they failed and help you to fix them.
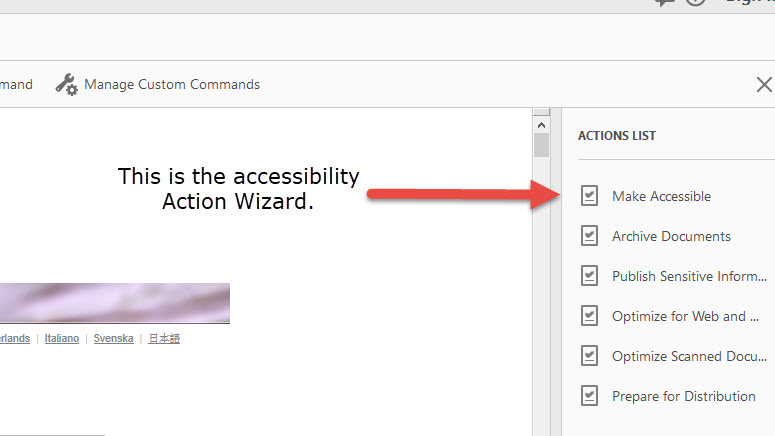
One other way to run a check on your document is by using the Make Accessible Action Wizard. You’ll open your document, then go to the Tools tab. At the bottom under Customize you’ll find the Action Wizard. Click on it to bring up the panel on the right side. There, click on “Make Accessible.” You can process a single or multiple files at once. Simply select Start. This will prepare the document for text recognition if necessary, adjust various settings, and run the Accessibility Checker.
This just scratches the surface of creating accessible PDFs. There are a lot of other factors to consider and things you can edit in Acrobat to ensure your course materials are usable by all of your students. If you need any help, please contact us. We’ll be happy to assist you in making your course more accessible.
Learn More
To learn more about creating accessible PDFs (and there is a lot more to learn!), we recommend the following resources.
Adobe: Creating Accessible PDFs
Accessible U: Creating Accessible PDFs
