
Well, sooner or later, we have to talk to our students, don’t we?
There are lots of ways to communicate with students, individually, or as a group within Ultra. Announcements and messages are the main way to do that. Let’s start with Announcements.
Announcements
Typically, Announcements go to the entire class.
You can find the announcements in the top menu:

When you click on this, this will take to your announcements page where all your previous announcements to the class are posted.
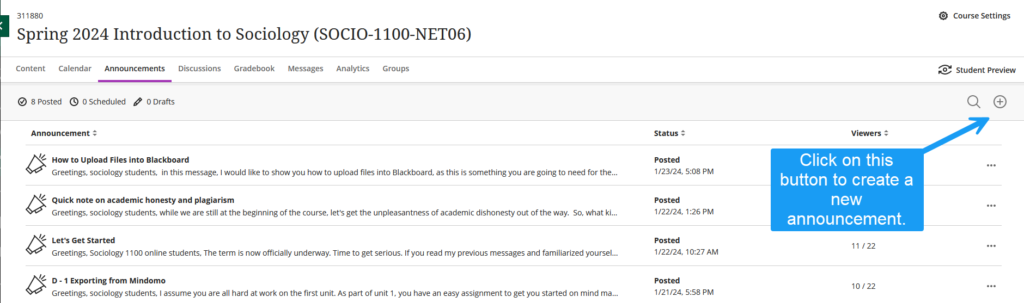
Once you click the + button at the top right, you’ll be taken to the announcement creation page:
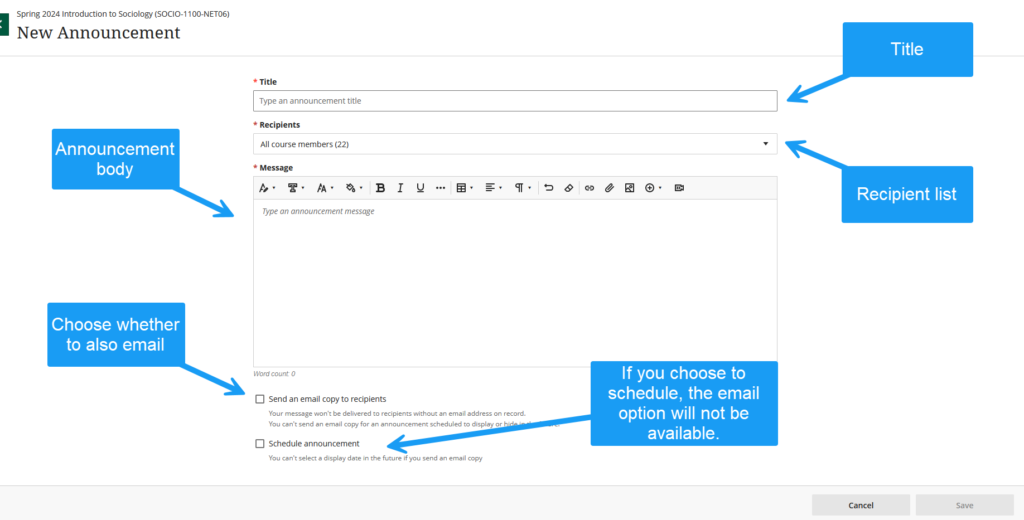
It’s all pretty self-explanatory. As with the current course view, if you schedule an announcement (as opposed to sending it now), then, the email option will not be available.
Also note the Save button at the bottom. By default, your new announcement will be saved as a draft. In order to actually send it, you need to save it first. Then, you will be taken back to your Announcements page where you have one more clicky thing to do:

That’s right. You need to click on that Post Now button to actually send your Announcement. And that’s it. You’ll get a copy in your email, as we currently get, unless you used the Schedule option.
Messages
Messages are obviously to communicate with individual students or groups. There are multiple ways you can start messaging students. Depending on course settings, students are also able to message you or each other.
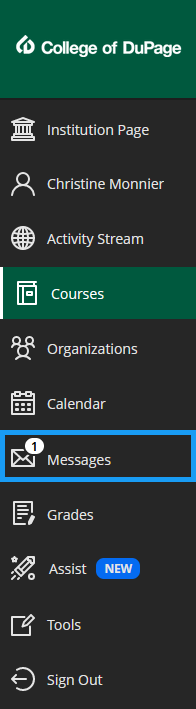
Messages are accessible from the top menu.

But before you start messaging students, you might want to check your course settings (always at the top right corner of the screen) to make sure they are exactly as you want them. This is what the settings look like:
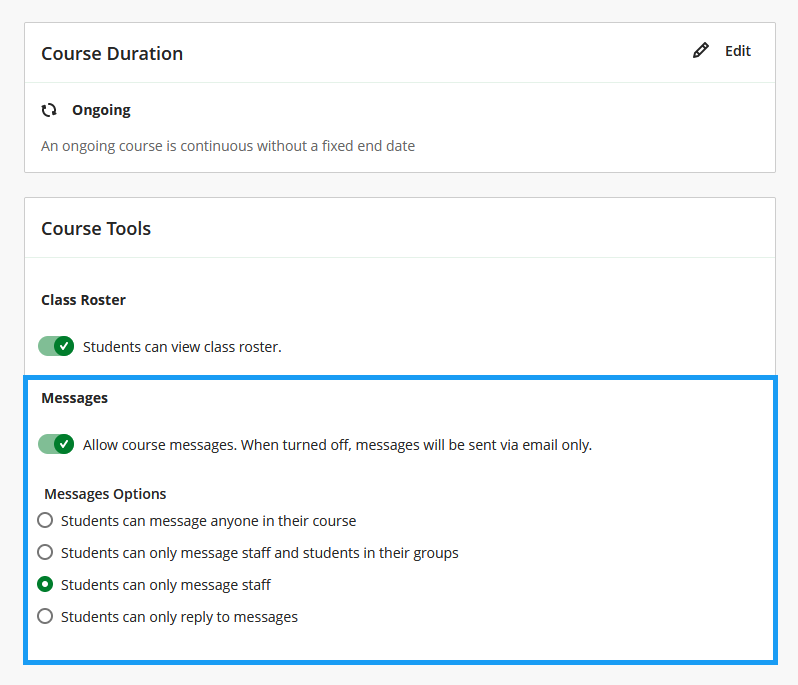
Pay especially attention to the messages section of those settings. This is where you set the parameters for the messaging within your course. For instance, you may decide that you don’t want messages at all and would rather just have emails for this course. And if you do allow messages, who can message whom? Note that you have a similar on or off option for the roster visibility to all students.
If you allow course messages, then unread messages will be visible from your main Blackboard page (what you see when you log in before you even get into a course):
But unread messages will also be visible in your course:

Again, those will appear if you have allowed messages in your settings.
To read the message, you just click on it.
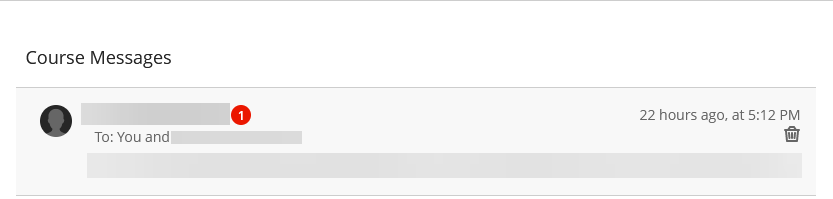
The to: line will indicate the sender(s) and recipient(s) of the message.
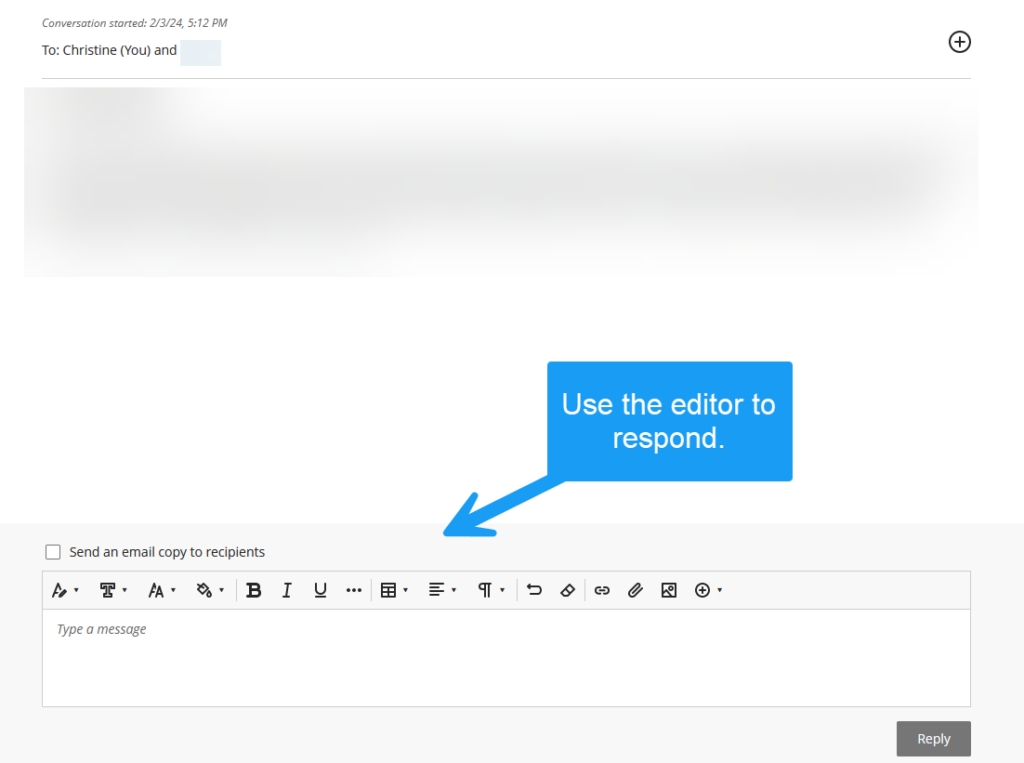
To respond, you just click on the sender’s name. This will open a page with the initial message, the sender and recipient (which you can modify), and the reply box with editor.
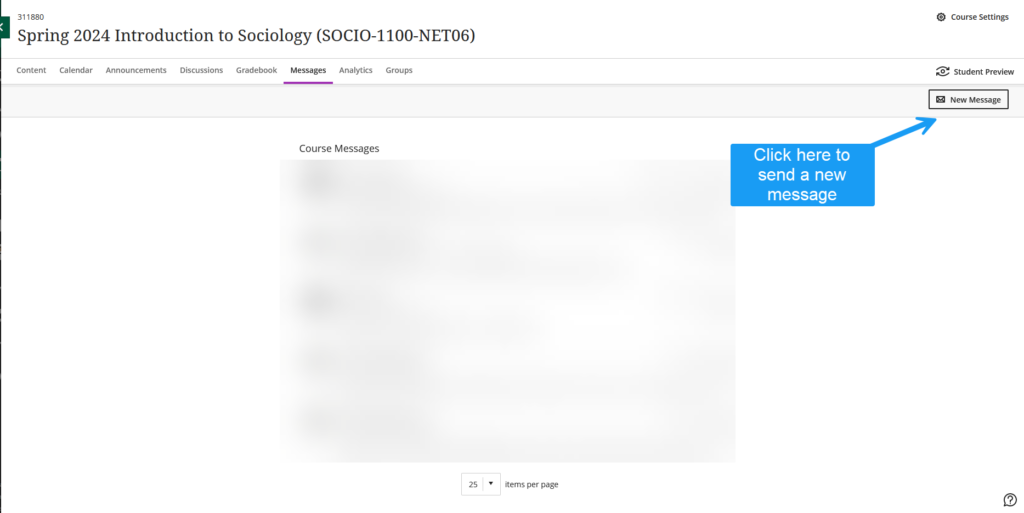
To send a new message, you just click on the new message button:
This will open a blank new message page:
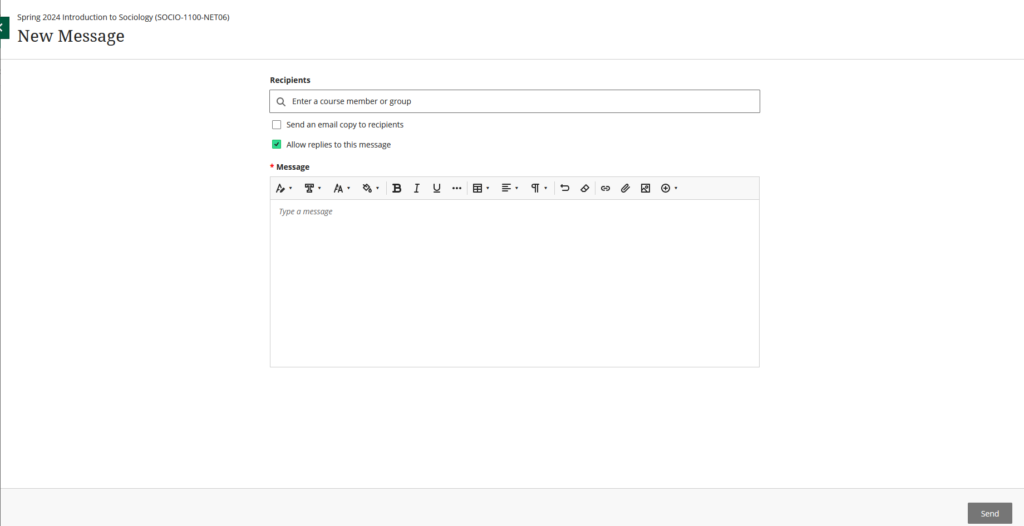
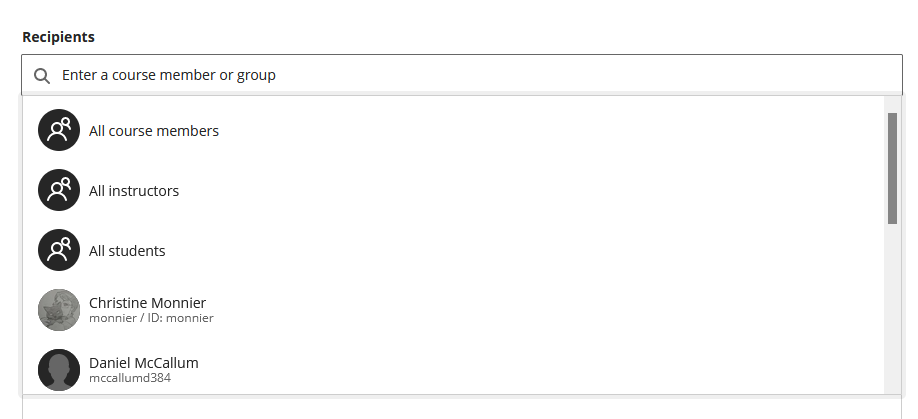
Note that when you put your cursor in the recipients box, you will get a bunch of preset options. If you scroll, your students will all be listed in alphabetical order. You can then customize your recipients list however you see fit.
As you can see, you can decide whether to allow replies to your message or whether the message should go to your students’ emails. Once you’re done, click send. No default save as draft though.
You can also send students messages through the gradebook. To do that, you would select the gradebook tab. In the gradebook, select the students tab.
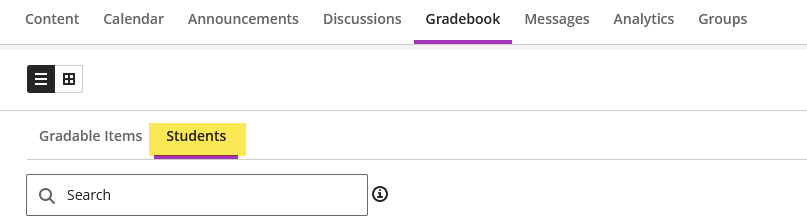
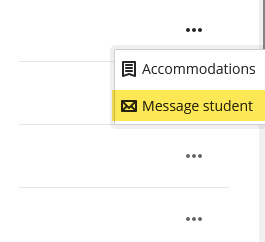
You will see the full list of your students, with their overall grade. At the end of each student row, click on the three dots to message them:
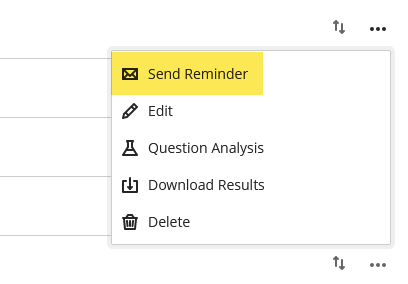
And as with our current gradebook, you can also send reminders to students who have not yet completed a graded item to nudge them into doing so. This will send a message to each student who has yet to complete an upcoming test or assignment. Under the gradebook, this time, select the gradable items view:
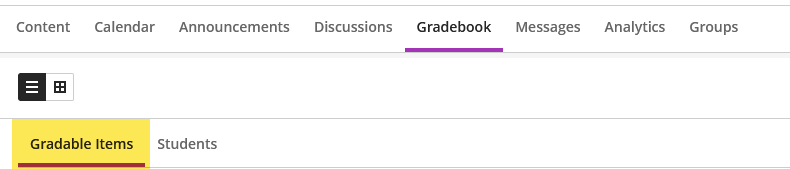
Then at the end of the row for the test or assignment you want, click on the three dots and select send reminder:
Lastly, you can also send messages to individual students from the roster page. Click on a student name. This will open a page with all their grades. On the top right, you will see a send message button.
As you can see, there are lots of ways to communicate your students, whether the whole class, groups, or individuals, from a variety of places in the UCV. You can customize quite a bit as well so that the communications settings fit what your courses need.
