
Well, at some point, we all have to start grading. In list view in the gradebook, there is a grading status column that pretty much tells you where you stand. Different grading statuses may show like this:
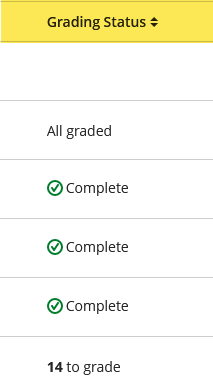
From what I understand so far, “all graded” means that all the submitted attempts are graded. In the case above, it’s a test that students can take twice… but not all of them do. Some take it once and are happy with their grade and don’t feel the need to try their second attempt. So, it is all graded (no further attempts to grade, manually or automatically). This is in contrast with Complete (with the green check mark), which means that all the attempts have been used and graded (in this case, there was only one allowed attempt). But this covers only the submitted attempts.
Ultra will also let you know how many students completed at least one attempt (whether one more more are allowed). In list view, it looks like this:

And then, back to the grading status up there, Ultra will tell you how many attempts you have left to grade. If you want to start grading, you can just click on the “x attempt to grade” (it turns into a link when you hover). This takes you to a page with your submission listed from the earliest to the latest:

If you want, you can enter the grade directly from this page, assuming you don’t care to read the submissions. But once you click on the first submission to grade it, it will open a new page with a bunch of options. By default, you get again your list of students with their answers to the questions (hence the student tab is selected):
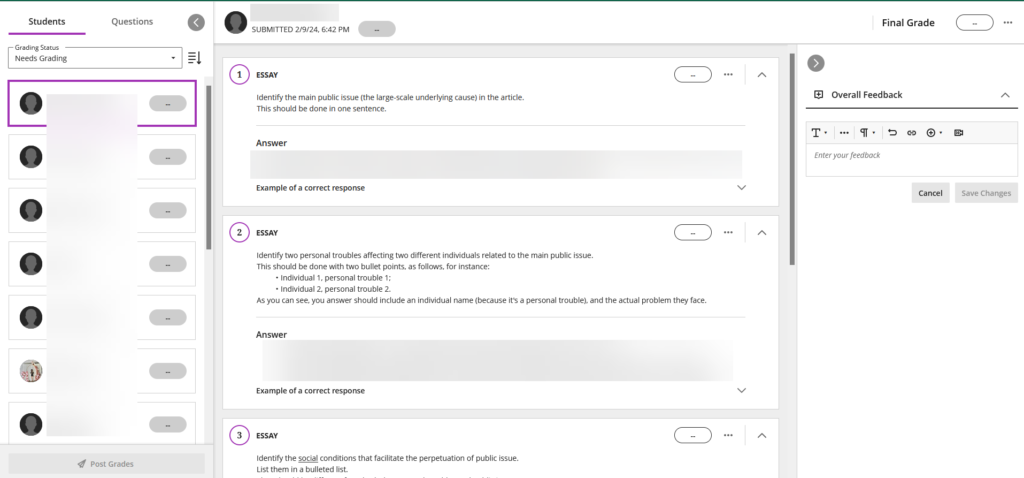
The left pane of the page just lists your students, with the submissions in chronological order. The middle pane contains the individual questions and your students’ answers, with a grade box for each question. And the right page allows you to enter your overall feedback. As you grade the questions, the final grade will be automatically calculated. If you checked the automatic posting option in your settings (see previous posts), the grade will be immediately posted.
In this particular case, I did set the test to automatically post the grade so the final grade looks like this for any grade attempt:

And back to the main gradebook page, it shows like this:

So you know right away what you still need to grade, what has been graded but not posted, and what has been posted. Again, you control those settings.
You can also choose to grade by questions instead of by students. To do that, you would switch to the Questions tab. In this case, the grading area looks like this:
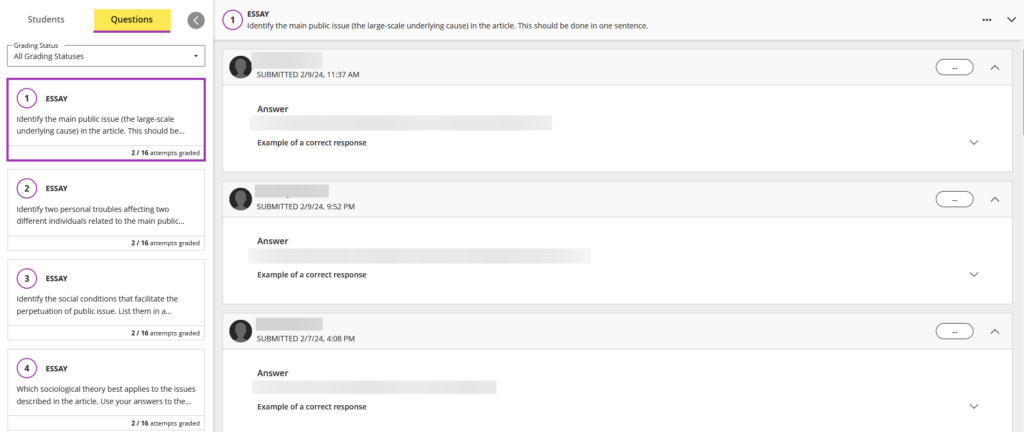
The left pane shows you which question you are currently grading, and the central pane shows you your students’ answers for that question, with a grade box.
One difference with the original course view is that I don’t see an option to add comments after each questions (which you can do in the original course view, in addition to entering an example of correct answer). In this case, you have to use the overall feedback box for that.
Anyhoo, now I gotta grade those 14 submissions but so far…

Oh come on, y’all knew there would be memes.
