
In a previous post, we looked at setting up tests and assignments in Ultra, and grading test submissions in the gradebook.
Grading assignments is pretty much the same thing. You navigate to the gradebook. You find the assignment you want to grade. Click on the “x attempts to grade”. This will take you to the assignment grading page, where you can either download files or grade inline, just as we already do in the original course view.
The assignment grading page looks like this:
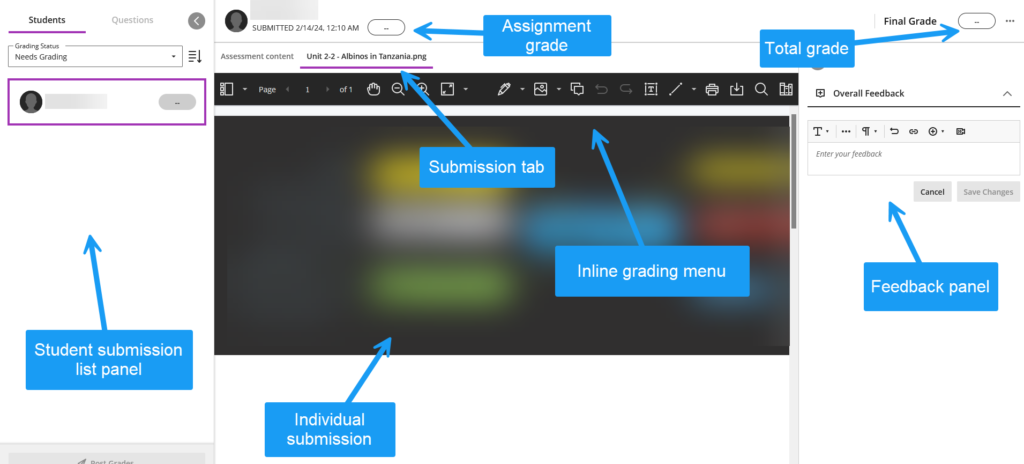
As you can see, this looks very similar to the open questions grading page for tests, except, in this case, because it’s an assignment, the Questions tab is not available. On the left, you will see your list of students (unless you set your settings to anonymous grading).
The central panel will be the submissions are loaded for your review and grading. There are two tabs, one that contains your assignment content (generally, your instructions), and for the actual submission. The inline grade menu bar, at the top, should look very familiar. It’s the same one we currently use.
On the right, you have the usual Overall Feedback panel, for your comments.
And if your assignment involves multiple parts, you can assign each part a grade that will add up to the final grade on the top right.
So, let’s face it, Ultra is a bit of a narc.

I have already mentioned a possible way of replacing the retention center, which does not carry over from the original course view.
Another way of tracking your students’ activity and performance in your course is through the Analytics tab.

I should preface this with noting that I have not spent a lot of time on the data that Ultra can generate. First of all, it’s still early in most of my courses, so there would not be much there there. Second of all, my focus has been more on running the classes I have, with the more basic functions. But after a few weeks of class, I still wanted to take a look to see if some of my students were already getting lost. So I took a peek at the basic info the analytics tab provides.
The course activity tab is the default one and the only one I have checked so far.
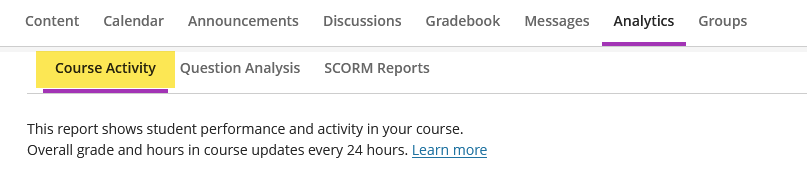
By default, it is organized by students and provides some basic information that may or may not be useful, depending on how your course is set up:

The three indicators I have highlighted are especially important because they can be used to set up rules that will generate automated alerts when students meet a certain condition on one or more of those three.
To set up alerts, on, the same page, you would click on the Alert Settings:

As always, in Ultra, this will open a panel on the right, where you will be able to set up the rules that will trigger the alerts you want.
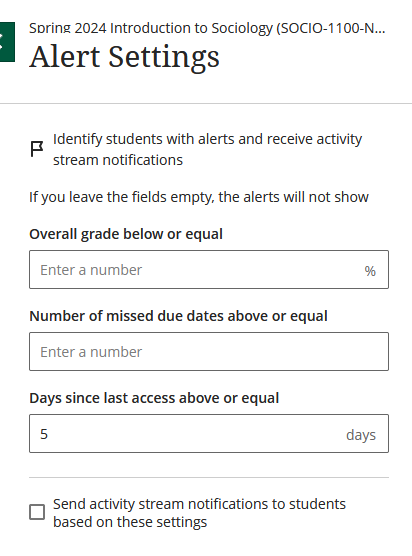
It’s pretty self-explanatory, which is a massive improvement from the retention center. And if those remind you of the Student Performance alerts I posted about last week, that’s because they’re the same. Ultra often gives us multiple places where we can do the same thing, which can be confusing.
But this assumes that your students check their activity stream.
We all check our activity streams, right??

Once you set up your alerts, you can filter your views on the Course Activity page:

So that is one simple way to check how your students are doing in the course and nudge them, if you think that would help.
