I am one of those people who like to maker her work simpler and more streamlined, hence my elation at the discovery of the date management tool in Blackboard, which I posted about in an earlier post.
The second key tool I use to streamline my workflow in Blackboard is the column organization page, accessed from the Blackboard gradebook. This page undersells itself since it does a lot more than just moving your column around in the gradebook. If you are interested in that, let me know and I’ll make a post of it later.
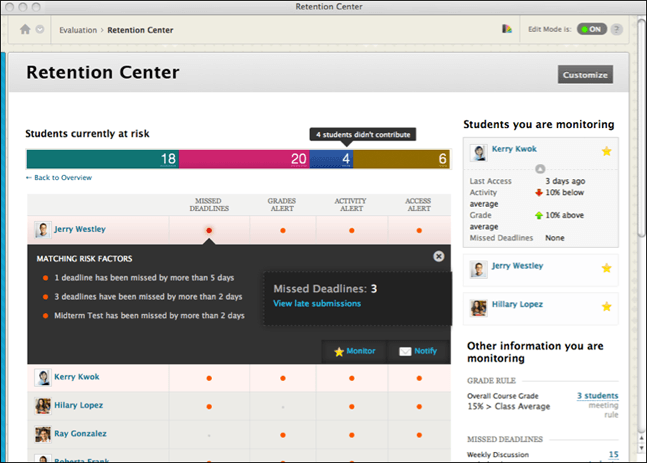
But more recently, I have discovered the wonders of Blackboard’s retention center, which is a one-stop way of keeping track of what is going on in your course, keeping track of who is doing well, and who seems to be losing ground, all in one table that is much more practical than poring over every item in the gradebook, which is super cumbersome.
I have only very recently started using the retention center, so, I do not claim to be using it as efficiently as it could be.
As always, a good way to get started with any Blackboard feature is to take a look at the documentation page for said feature. You can find it here. It is pretty straightforward.
There is also a brief video that you should watch as it gives the basics:
But let me walk you through the retention center for some of my classes so you can see what it’s like. Then watch me (and be amazed!) as I create rules to keep track of students at risk and give a quick “kudos!” to students performing well.
There is far more to explore in the retention center than the documentation or the video really show, so, let me do that.
First off, the general features of the retention center:
And then, the default rules and how to customize them or create new rules:
For a more step-by-step approach to the retention center, this page is pretty detailed.
As always, thank you for reading.
Christine
